

Everybody loves the exotic allure of the Tiki Torch. They help create such a fun and inviting atmosphere inspiring the wearing of Hawaiian shirts and sandals, dancing to Jimmy Buffet music, and imbibing various umbrella drinks under a thatch-roofed bar. Every time I drive by a yard with Tikis going, I’m filled with envy. I want to go to that party!
As fun and inspiring as this backyard accessory can be, it’s vitally important to have them set up properly. They are, after all, a torch that is powered by liquid fuel elevated off the ground. It’s good to have them set up securely, in plain view, but at the same time, out of the way.
*** SAFETY FIRST ***
1 – It is very important to remember not to use any fuel that is not recommended by the manufacturer. Do Not Use Gasoline!
2 – Do not use in windy conditions. It’s not worth the risk of a torch falling over, especially in a crowd.
3 – Do not tip torch as fuel can spill and cause a fire and/or serious injury
4 – Store fuel in the original fuel bottle with a cap secured
5 – Dispose of any unwanted fuel following local laws and regulations
6 – Do not use a fuel canister outside of the torch
7 – Only use wicks that are approved by the manufacturer.
Necessary Tools:
In this case, I will use
- A pickaxe to loosen the earth and create a primary hole in the ground.
- A 1-foot length of 3/4 inch PVC pipe
- A Mallet for pounding the pipe into the ground
- Installation:
See the accompanying video below…
- Take a moment to figure out the best places to install keeping in mind that you should place a Tiki Torch in a well-ventilated area and, of course, never indoors (it may sound silly to mention. But, you’d be surprised what some will try).
- Once safe placement spots have been established, use the pickaxe to open up the ground for the subsequent use of the PVC pipe.
- Once the hole is established, insert the PVC pipe into the hole and, with the mallet, begin to pound the pipe into the ground. You will have to remove the pipe several times to relieve the dirt built up within by tapping on the outside of the pipe until the dirt is removed. You will need to create a hole that is about 8 inches deep (the deeper you go, the more stable the Tiki Torch during use.
- Once you have achieved the proper depth as described, insert the Tiki Torch and hold it upright within the hole in the ground. With the mallet, pound down the surrounding earth to properly and safely secure the Tiki Torch being careful not to crack or break the pole of the Tiki Torch. If you are unsure about the status of the pole of the torch before or after the installation, do not use the Torch as it could be unsafe.
This link will provide you with the manufacturer’s (Tiki® ) instruction guide.
Once the torch pole is securely in the ground, the next task is to fill and insert the torch itself. To do so:
- Remove the top of the torch canister and set it aside for the moment.
- Add your favorite Tiki Torch fuel (remember to use only the fuel that is recommended by the torch manufacturer) to about 1/2 inch below the seam of the torch canister, being certain not to overfill.
- Wipe away any excess fuel
- Set the wick to about 1/2 inch in height and replace the top of the canister.
It is suggested that, while you can use matches to light the torch, you might be safer using a long-reach butane lighter, especially if there is a propensity for missed excess fuel near you at the time.
There are several on the market. I have used this one for many years and am quite pleased with how handy it has been for so many things…
As discussed in the above; If I may offer…

BIC Multi-Purpose Candle Edition Lighter & Flex Wand Lighter
As I said, this isn’t completely necessary but, it is safer for lighting Tiki Torches and candles too.
They come in quite handy for many other uses around the house as well.
At the End of the Evening…
It is recommended by the manufacturers that you use the cap that is attached to the torch to snuff out the flame on your torch. Once the flame is out, remove the cap and allow the wick to cool for 30 minutes. At that time you can re-cap the torch and remove the torch canister(s). It is further recommended that any excess fuel is to be stored in the original bottle from which it was dispensed. Once again, see the instructions and warnings here…
For your party’s highest comfort, I recommend the following products meant to provide fun, beauty, and terrific bug protection…
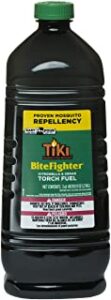
TIKI Brand Bitefighter Torch Fuel
This particular fuel has been developed to repel mosquitos and the like.
I have found that it works quite well. Check it out on Amazon…
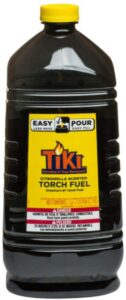
Tiki Brand Citronella Torch Fuel
Citronella is the most commonly found fuel in average hardware stores
Note: There are several brands of backyard torches. The one depicted here is a Tiki Brand Torch made of bamboo. This is the most popular brand and most popular type on the market today. There are several other types available including models made of different metals and finishes that are also adjustable in size.
If you would like to make your backyard, even more, Tiki festive, make sure to see our Tiki Collection page.
Best of luck with your parties and gatherings. Have fun but, be safe…
Berk